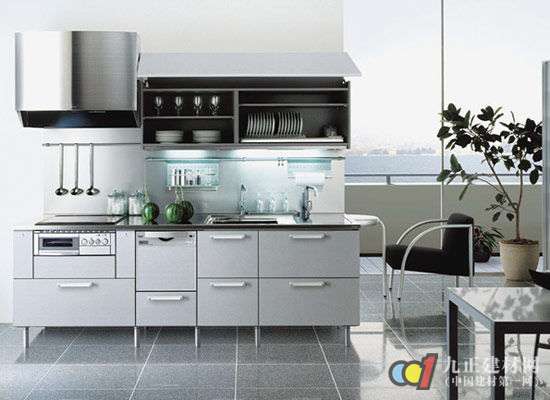
The installation of cabinets, including the installation of cabinets, hanging cabinets, countertops, hardware and other components, whether the installation of cabinets is in place is not only directly related to the aesthetics of the cabinets, but also related to the future use. Therefore, the cabinet must be installed in a certain order, and the necessary details must be handled.
First, the steps to install cabinets in different parts
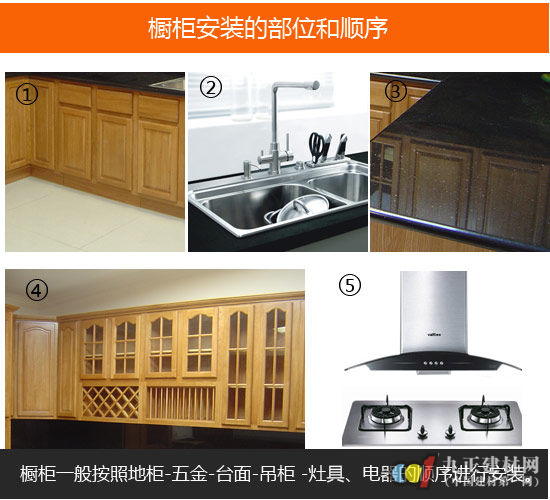
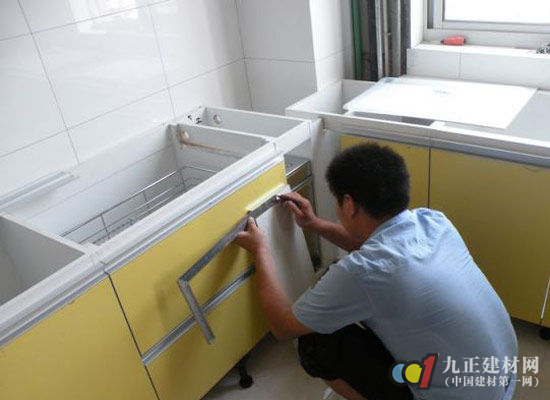
The cabinet includes a large number of parts. The installation generally requires two technicians. After entering the cabinet, the cabinets are generally installed in the order of cabinets - hardware - countertops - wall cabinets - stoves and appliances.
Installation points of the cabinet: The cabinet installation is divided into three steps, measuring the size, finding the reference point, connecting the cabinet
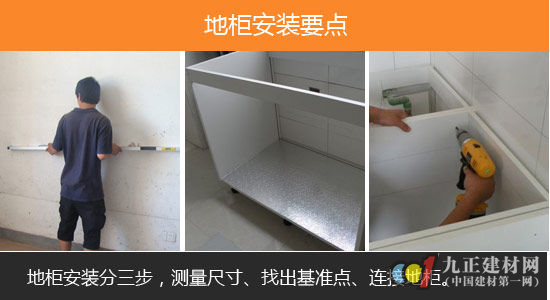
Before installing the cabinet, workers should clean the kitchen floor to accurately measure the ground level. If the cabinet and the ground can not reach the level during installation, the gap between the cabinet door (decoration effect diagram) can not be balanced. The installation worker can use the level to measure the ground level and the wall surface to understand the ground level and finally adjust the cabinet level.
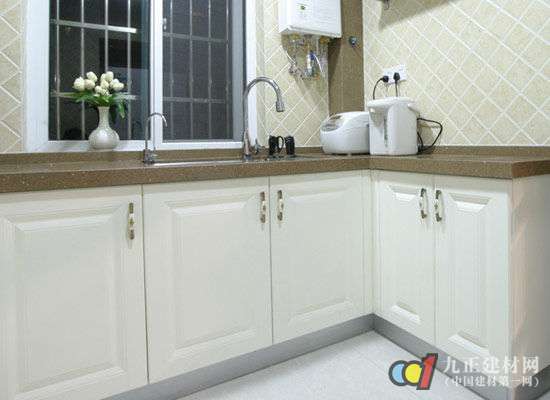
If the cabinet is L-shaped or U-shaped, you need to find the reference point first. The L-shaped cabinet will extend from the right angle to the two sides. If there is a gap from the two sides to the middle, the U-shaped cabinet will be in the middle. The one-piece cabinet is placed neatly, and then placed from two right angles to the two sides to avoid gaps. After the floor cabinet is placed, it is necessary to level the floor cabinet and adjust the level of the cabinet through the adjustment legs of the cabinet.
The connection between the cabinets is also an important step in the installation of the cabinet. Generally, four connectors are required to connect between the cabinets to ensure the tightness between the cabinets. In order to save installation costs, some cabinet manufacturers use poor quality self-tapping screws to connect. Self-tapping screws not only affect the appearance of the cabinet, but also lock the cabinet from one end, and the connection is not high.
The main points of hardware installation: the basin, the faucet and the basket are also the highlights of the cabinet. In order to avoid the wood chips falling into the basket track when installing the hanging cabinet and the countertop, cover the basket with the covering to avoid affecting the future use.
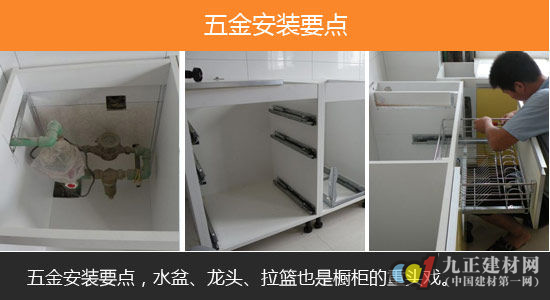
When installing the cabinet, the installation of the water will be done by means of on-site opening. The hole will be drilled according to the size of the pipe with a professional punch. The diameter of the hole should be at least 3-4 mm larger than the pipe, and the hole should be opened after punching. Partly sealed with a sealing strip to prevent water from swelling and deforming at the edge of the wood, affecting the service life of the cabinet.
In order to prevent water seepage in the basin or the water, the connection between the hose and the basin should be sealed with a sealing strip or glass glue. The hose and the sewer should also be sealed with glass glue.
The main points of the installation of the cabinet : There are two points to install the cabinet, find the horizontal line and the counter connection.
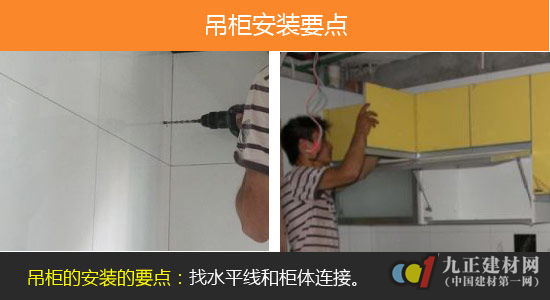
When installing the cabinet, in order to ensure the level of the expansion bolt, it is necessary to draw a horizontal line on the wall. Under normal circumstances, the distance between the horizontal line and the table is 650 mm. Consumers can propose the cabinet and the cabinet to the foreman according to their height. The distance between the adjustments is convenient for future use.
When installing the wall cabinet, it is also necessary to connect the cabinet with the connecting piece to ensure the tight connection. After the cabinet is installed, the level of the cabinet must be adjusted. The level of the cabinet directly affects the aesthetics of the cabinet.
The main point of the countertop installation: the installation of the cabinet countertop should pay attention to the glue bonding time required in different seasons.

At present, the countertops used by consumers are mostly artificial stone or natural stone countertops. The stone countertops are made of several pieces of stone. The bonding time, the amount of glue used and the degree of grinding will affect the appearance of the countertop. Generally, it takes half an hour to bond the table top in summer and one hour to one and a half hours in winter. When bonding, use professional glue to bond. In order to ensure the beauty of the countertop joints, the installer should use a sander to polish and polish.
Appliance installation: Install the appliance and pay attention to the layout of the power hole, the size of the stove and the safety of the air inlet.
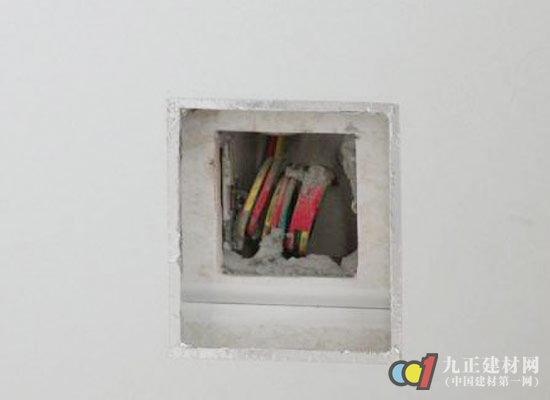
The installation of the embedded electrical appliances in the cabinet only needs to open the power supply hole on the spot. However, the power supply hole cannot be opened too small to avoid disassembly in the future. Some consumers require workers to wrap up because of the unsatisfactory water meter and gas meter. If workers wrap the water meter and gas meter, they will have troubles in future repairs. The state also has relevant standards that do not allow packaging of electricity meters and gas meters.
In order to ensure the use and smoking effect when installing the range hood, the distance between the range hood and the cooktop is generally between 750-800 mm. If the installation height is too high, it will affect the smoking effect. When installing the range hood, it should be aligned with the left and right sides of the cooker. The height can be adjusted according to the actual situation.
The most important thing to install the cooker is to connect the gas source. Make sure that the gas port is not leaking. The gas source should be connected by a natural gas company. If it is installed by a decoration worker, the gas company needs to go to the door to check for leaks.
Adjusting the cabinet door: The final step of installing the cabinet is to adjust the door panel to ensure that the gap between the cabinet door is even and horizontal, the depth of the cabinet is generally 550 mm, and the cabinet is 300 mm. The consumer can also adjust according to the actual situation. After adjusting the door, the workers should also clean up the garbage left when installing the cabinet to ensure the cleaning of the owner's kitchen.
Second, the details of the cabinet installation skills

There are a lot of details to be installed in the cabinet. Careless installation will often affect the future use and service life of the cabinet. The more important details of cabinet installation are cabinet measurement, rail installation, shelf installation and cabinet door installation.
Wall cabinet measurement: The cabinet of the wall cabinet can be either a wall or a sandwich, so as to ensure the effective use of space without deformation, but the top and bottom should be horizontal and perpendicular to each other. If there is any error, The height difference between the left and right sides of the hole is required to be less than 5 mm, and the bottom wheel of the wall cabinet door can compensate for the error through the debugging system.
Installation of the track: When making the cabinet, the size of the track should be reserved. The upper and lower rails are reserved for the folding door 8cm and the sliding door 10cm.

Installation of partitions: The cabinets of the homes generally have drawer design. In order to not affect the use, the position of the drawer should be noted: when making three sliding doors, avoid the intersection of the two doors; when making two sliding doors, it should be placed One side of the door; when the folding door is made, the drawer should have a 17cm gap from the side wall.
Installation of the closet door: first fix the top rail of the closet door, the front front facing of the rail is in the same plane as the cabinet surface, and the upper and lower rails are placed flat in the reserved position; then the two doors are placed in the rail, using a horizontal ruler or straight Measure the verticality of the door, adjust the position of the upper and lower rails and fix it; check again whether the door is parallel to the two sides. Adjust the bottom wheel to adjust the door to reach the level of the frame and both sides; finally, fix the anti-jump device. And present a quality protection book.
Other installation details: The kitchen tiles should be completed before the cabinet is installed, and the floor and wall surfaces in the kitchen cabinet area should be cleaned.
Install the panel of the kitchen in advance, and mark the position of the wall water circuit to conceal the pipe to avoid hitting the pipeline during installation.
The position of the kitchen ceiling light must pay attention to avoid the cabinet door of the hanging cabinet to prevent the fight. It is necessary to add a pad under the countertop to improve the support strength of the countertop.
Third, acceptance and maintenance of four-step cabinets

Better installation quality is an important part of the overall cabinet quality assurance, and it is also the most important part of avoiding problems after use. Consumers should pay more attention to it, which will cause the merchants to attach great importance and do their best to do their best.
Acceptance of cabinet installation : cabinet installation and acceptance look at the appearance, second look at the data, three look firm, four look at safety performance.
1. Look at the appearance. Good cabinet installation must first strictly follow the drawing requirements, and you must not change the position at will.
2. Look at the data. The tolerance for cabinet installation should be less than 2mm.
3, look at the degree of firmness. First, the wall and the wall should be firmly joined; secondly, the connection between the components of the spliced ​​structure should be secure and not loose.
4, see security performance. All drawers and baskets should be freely pullable, unblocked, and have limited protection.

Door panel acceptance details: door panel installation should correspond to each other, high and low, all neutral seam width should be consistent; handle should be on the same horizontal line (except for special design); countertop should be smooth, bright, no obvious scratches, stitching seam is not obvious; The water connection is unobstructed, and the water is not poured into the water; the drawer is opened about 50mm (limited to damping pumping), which can be automatically closed, indicating that the bearing capacity is stronger.
Cleaning and maintenance of cabinets : daily cleaning of cabinets can be kept clean with a sponge and a neutral detergent. If disinfection is required, use diluted daily bleach (1:3 or 1:4 with water). ) or other disinfectant to wipe the surface. Please wipe off the water stains with a towel and try to keep the table top dry. Small stains can be found, which can be wiped with a neutral detergent or gel-like toothpaste.
Descaling: Due to watery scale and strong oxidant (chloride ion) in the water, the water will stay on the countertop for a long time, which will cause it to be difficult to remove. Please blow it off with a hair dryer. After a few hours or a few days, the stain will slowly disappear. Fine white marks can be removed by moistening the dry cloth with edible oil.

The stain removal step of some stubborn stains depends on the degree of polishing of the surface of the board.
Matte surface: The table is sanded with a decontaminating detergent circle, then cleaned and dried with a dry towel. Wipe the entire table with scouring pad at intervals to keep the surface smooth.
Semi-matte surface: sand with a scouring pad, non-abrasive detergent circle, dry with a towel, and use a non-abrasive polish to enhance the surface finish.
High-gloss surface: Grinded with a sponge and a non-abrasive polish. Dirts that are difficult to remove can be sanded with 1200 mesh sandpaper and then brightened with a soft cloth and a brightener (or furniture wax).
[Scan the QR code below, pay attention to the WeChat public number "Jiuzheng cabinet network "; you can view the popular article "The boss's bitterness: 10 bosses, 9 are bitter! ", want to communicate with peers to join Jiuzheng Building Materials Net cabinet exchange group]
Alumina Ceramic disc mainly used in faucet valve, water diverter as a key component of sealing system.
We have been supplying hundreds of ceramic disc from domestic and overseas client, including whole seres of standard specification. Besides, we can work together with our customer to support their special need per their drawing and specification.
Alumina Ceramic Seal Disc,Industrial Alumina Ceramic Seal Disc,Electrothermal Alumina Ceramic Seal Disc,Microporous Alumina Ceramic Seal Disc
Jinghui Industry Ltd. , https://www.ceramictek.com